Quickstart
Quickstart
This page describes the shortest path to launching an Agent task in Heicode. You don't need to configure a model provider in advance, and you don't need to touch the secret vault backend.
Before you start
- A Heicode account.
- The Heicode client installed, or available for download.
- A goal you want to accomplish, such as fixing a bug, building a feature, generating documentation, or deploying a project.
- If the task involves code, a Git repository ready to go.
- If the task involves deployment, a cloud account or authorizable cloud resources ready to go.
Step 1: Sign in to Heicode
- Open Heicode Manager.
- Sign in with your account.
- Confirm that the home page shows tasks, resources, model usage, and the client download entry point.
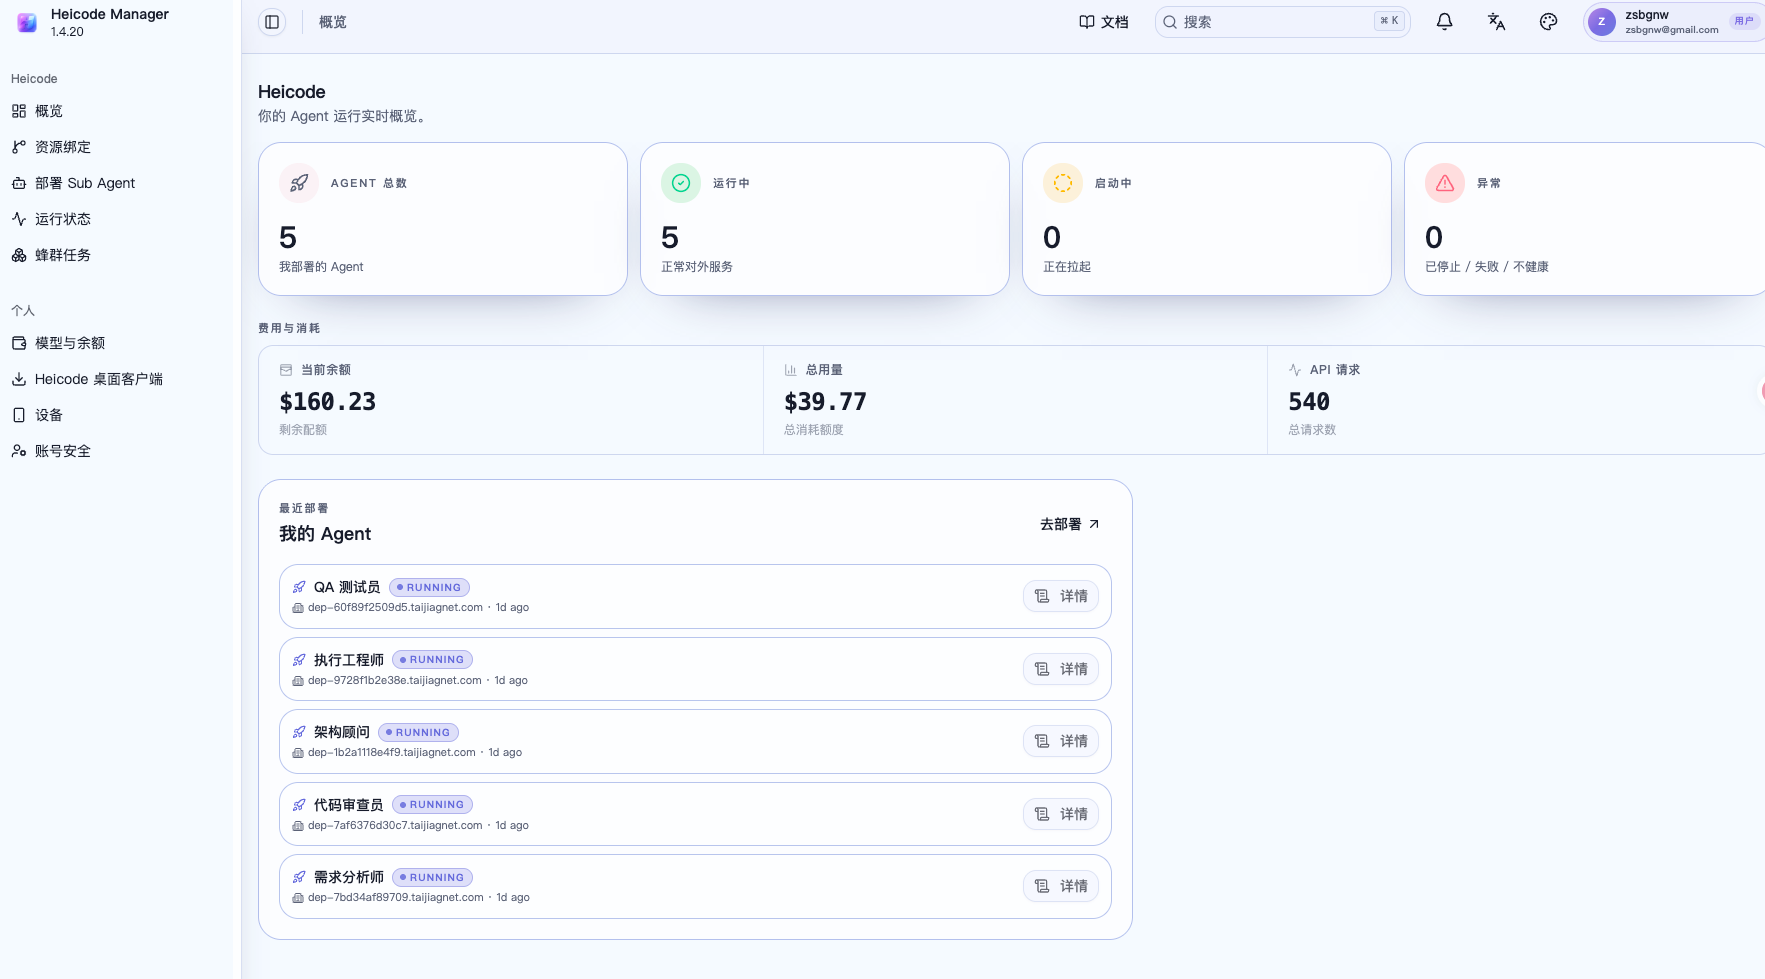
Step 2: Bind resources
Click Resource Binding on the left. A Git resource is the foundation — both Sub mode and Swarm mode require a Git resource binding before they can be used. Common resources include:
- Git repositories.
- Product documentation.
- SK skill libraries.
- Cloud accounts.
- Cloud resources, such as databases, static sites, Kubernetes, and object storage.
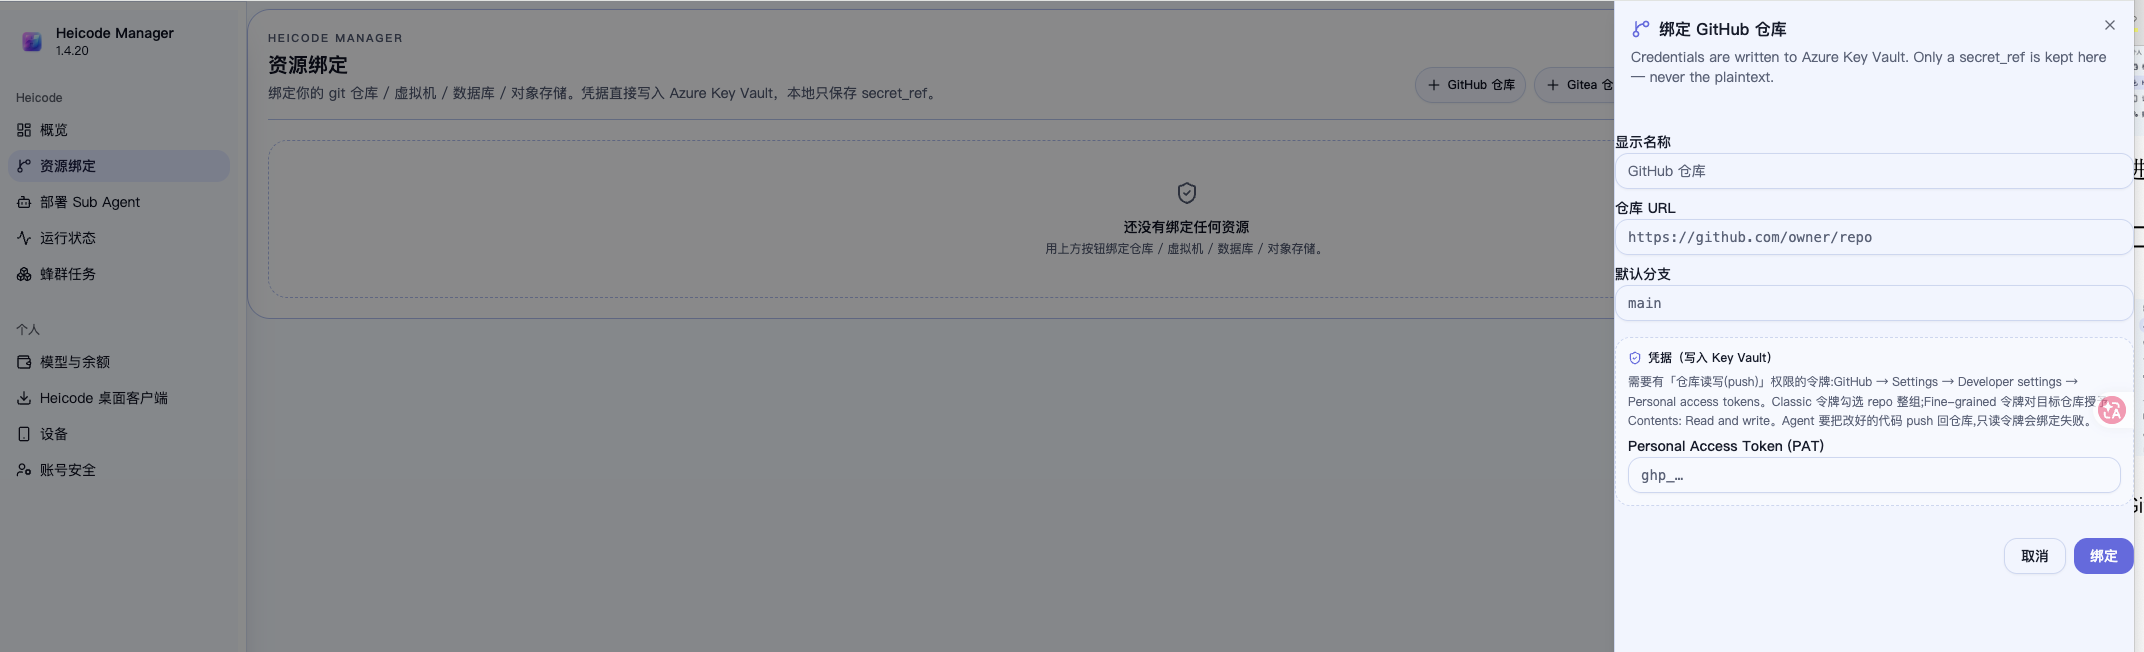 After connecting a resource, Heicode shows its masked status and scope. Long-lived secrets go into the secret vault, and the page only shows the reference and its status.
Step 3: Deploy a Sub Agent
Click Deploy Sub Agent on the left side of the page. You can choose a single Agent or a developer team; once deployed, the deployed Agent is shown in sync at the bottom of the page (by default, up to 5 Agents can be installed — the exact number depends on your plan).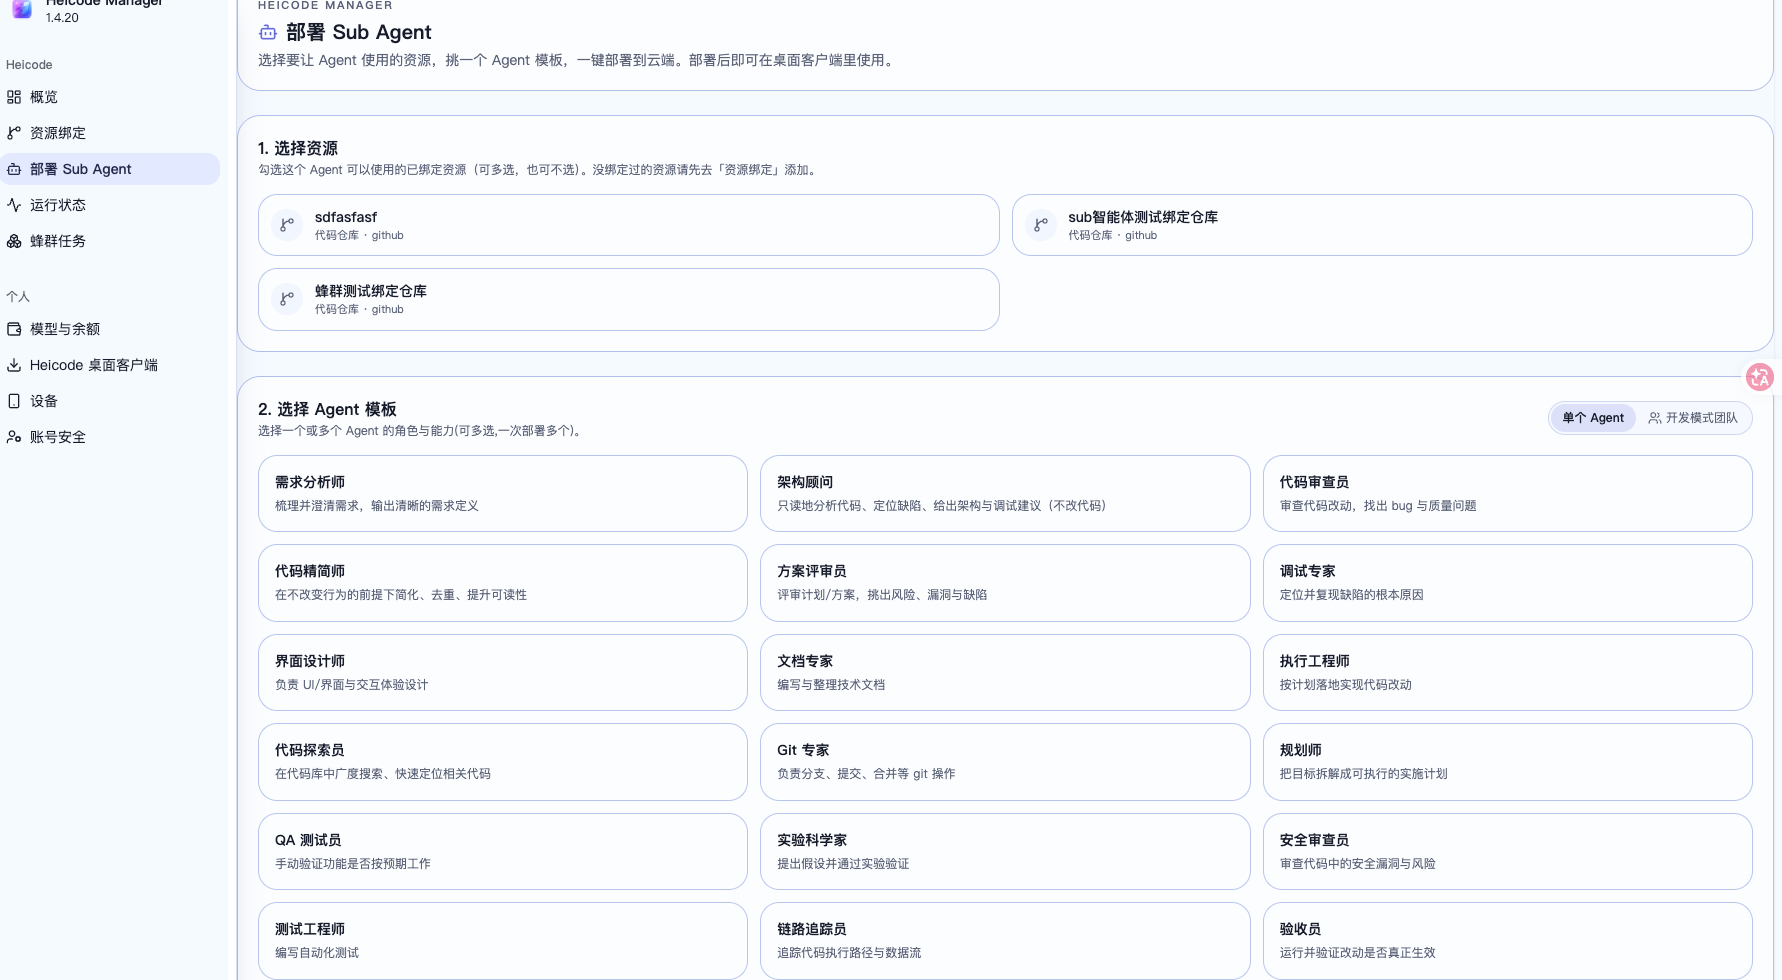
 Swapping or deleting an already-deployed Agent is also done here.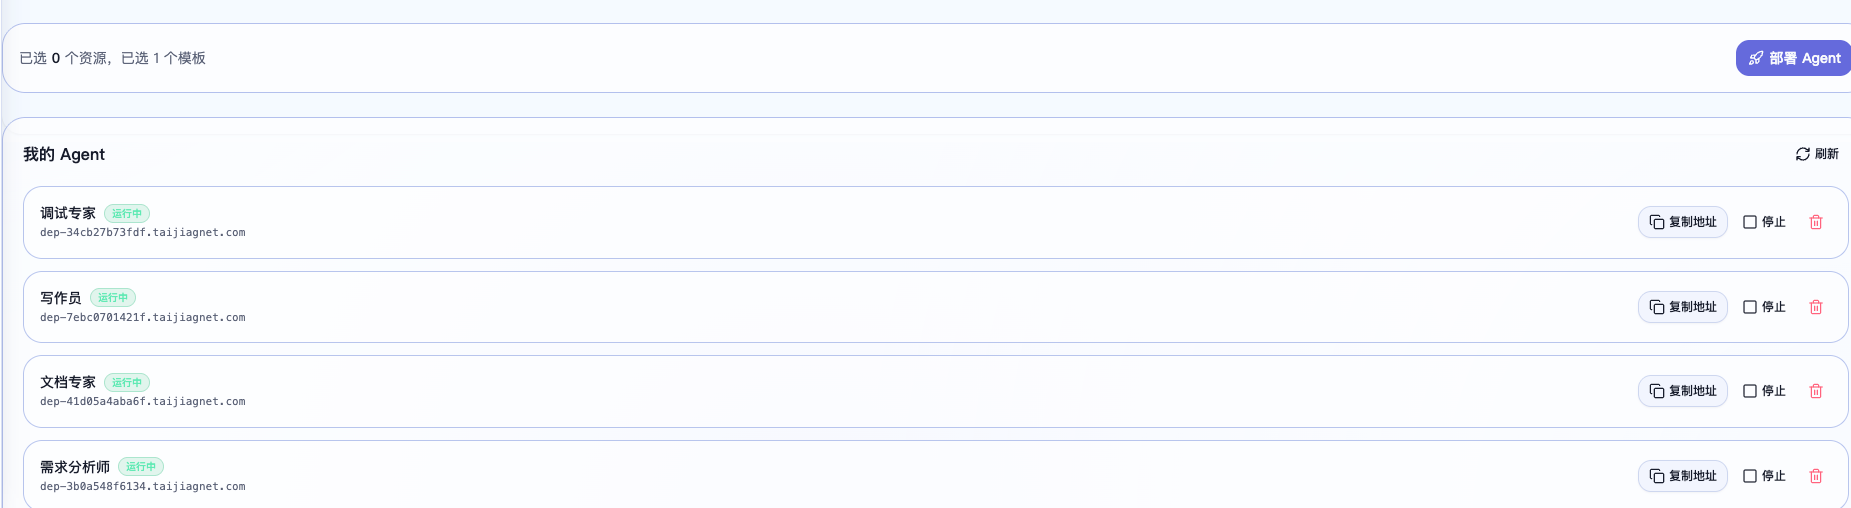
Step 4: Download and install the Heicode client
Click Heicode Desktop Client on the left side of the page, download the client for your system, and open it.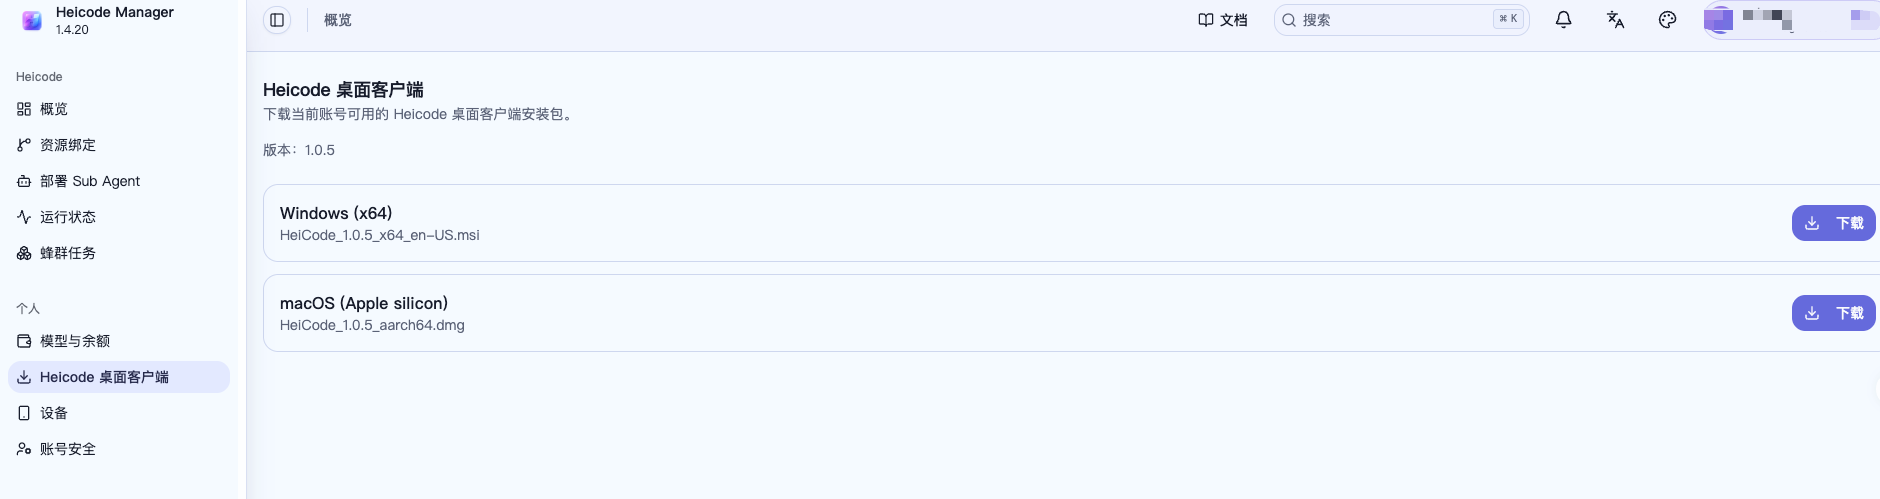
Step 5: Call the deployed Sub Agent
Sign in from the client. Click Agents on the client's home page — you'll see and can select the Agent you just deployed in Heicode Manager. Check it to start using it.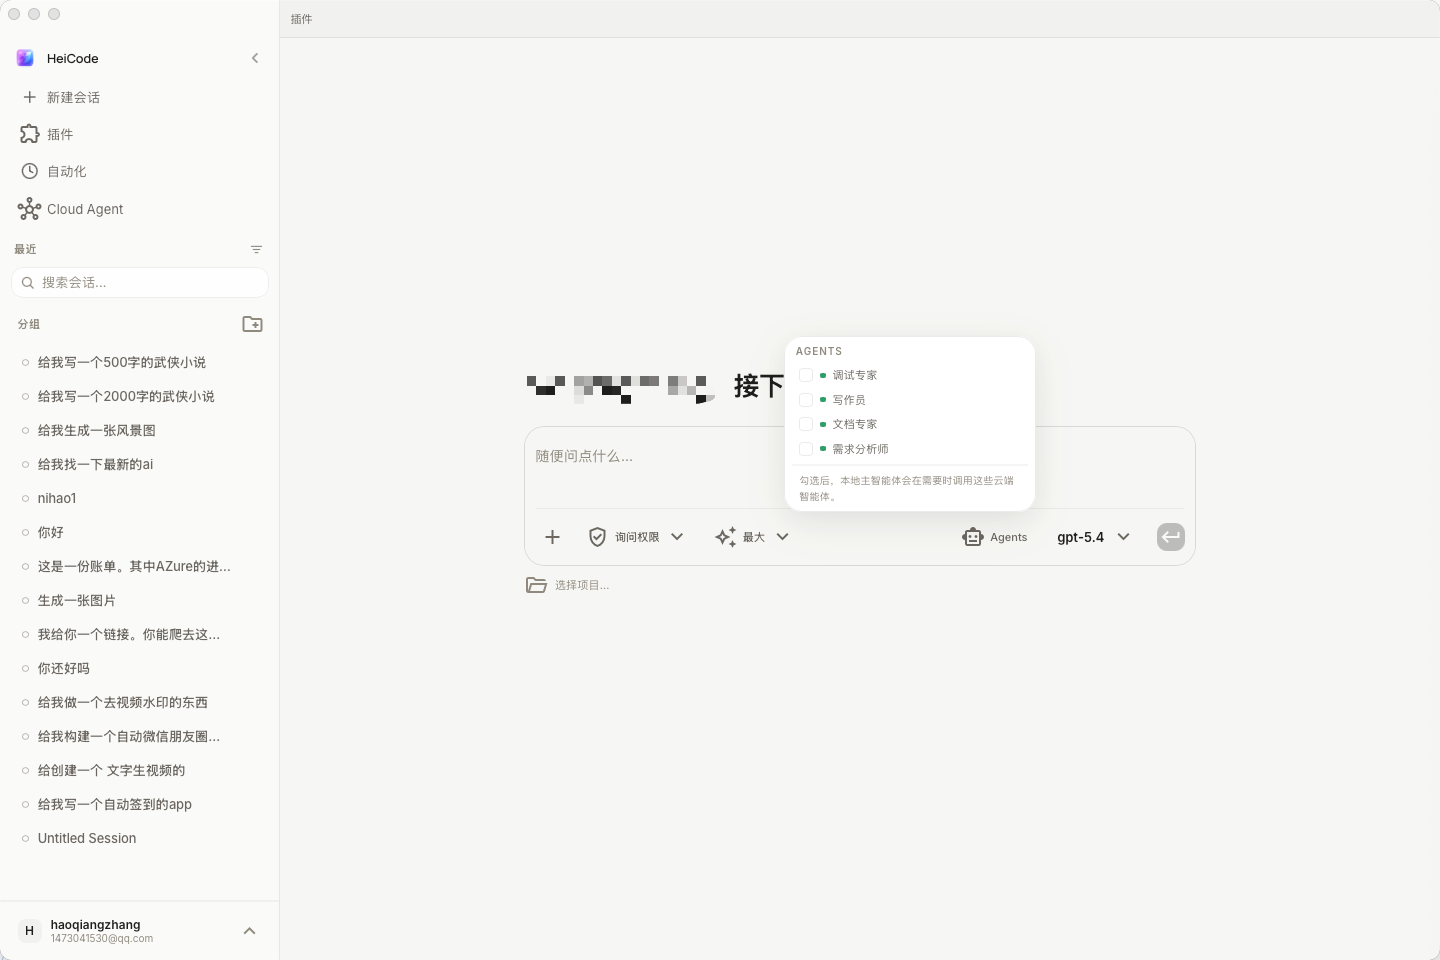
The user mainly enters tasks and handles approvals in the client. Manager is used for preparing resources, launching Agents, and viewing status, usage, and audit logs.
Step 6: Enter a goal
Enter what you want to accomplish in the client.
Recommended format:
What I want to do:
Existing code or documentation:
Where I want to deploy:
What must be confirmed with me first:
Acceptance criteria:
Example:
I want to add a resource center page to our existing website.
We already have material in docs/product-package.
The resource center should be written as an in-site document, not a link out to Git.
Deploy to Azure Static Web Apps once the build passes.
I need to confirm before deployment.
After submitting the goal, the Agent starts executing. You can view the progress in the task view.
Step 7: Watch the task status
Once the task launches, you'll see the task view.
There are nine top-level task states:
| Status | Meaning | What you should do |
|---|---|---|
| created | Task created, not yet started preparing | Wait |
| preparing | Platform is organizing resources and context | Wait |
| running | Agent is executing the task | Monitor progress |
| waiting_approval | A pending approval request exists | Review risk and approve or reject |
| degraded | Some capabilities unavailable, task continues in limited mode | Monitor the degradation reason |
| verifying | Agent is verifying deliverables | Wait for verification to complete |
| completed | Task completed successfully | Review deliverables |
| failed | Task stopped due to an error | Check failure reason and retry or adjust resources |
| stopped | Task stopped by you or the platform | Review results, restart or duplicate the task |
The following prompts may also appear in the task view, corresponding to specific signals under the running state:
- Needs input: The Agent needs you to provide additional information, resources, or permissions — open the task and reply.
- Awaiting approval: A pending approval request exists (the approval request itself has its own states: pending / approved / rejected / expired) — review the risk and approve or reject.
- Ready to review: The task is still running, but has already produced deliverables you can inspect ahead of time.
Step 9: Handle items that need your attention
The Agent may need you in these situations:
- The requirements aren't clear.
- A resource isn't connected.
- Permissions are insufficient.
- The budget is insufficient.
- Production deployment is needed.
- Access to production secrets is needed.
- Confirmation of the implementation direction is needed.
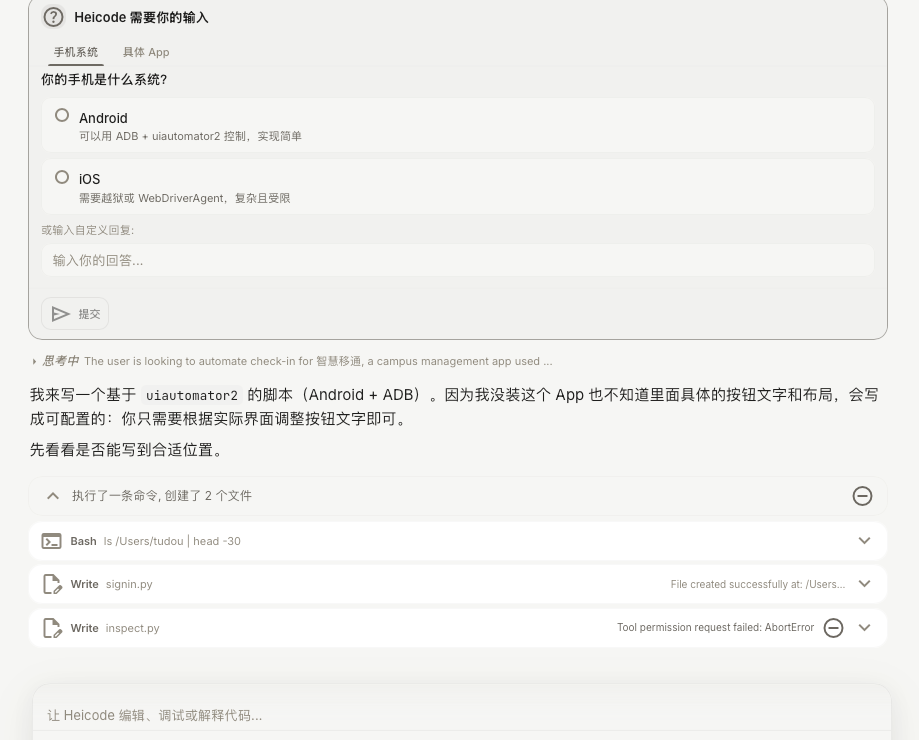
In the task view, you can reply, approve, reject, or stop the task.
Step 10: Review the results
Once the task is done, check:
- Deliverables.
- Code diff.
- Test results.
- Build results.
- Deployment results.
- Model usage.
- Approval records.
- Audit records.
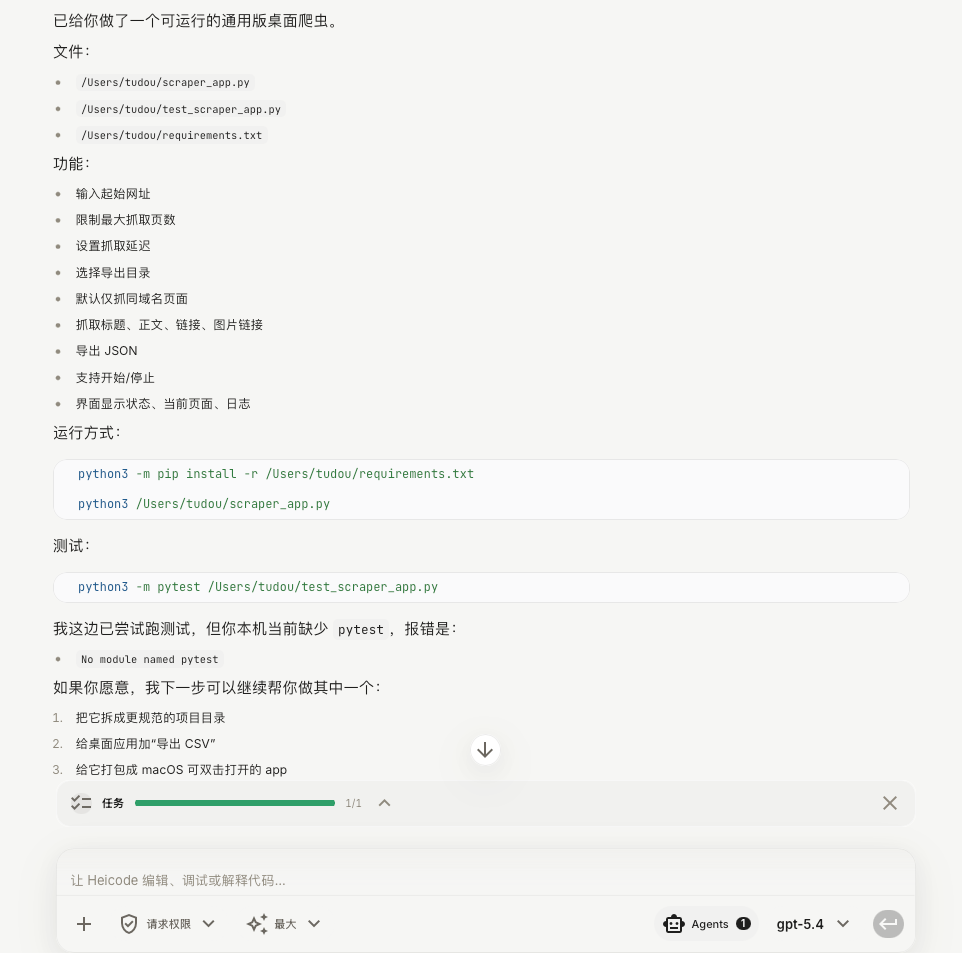 If the result is incomplete, you can continue adding requirements in the client, so the Agent moves into the next iteration.
Last updated on